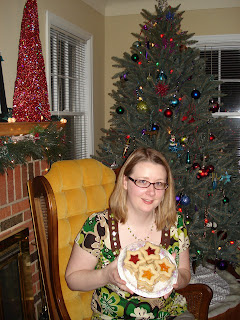
Friday, July 31, 2009

Bulk Gerbera Daisies from Costco


I briefly considered DIY-ing all of the flowers for my wedding, but decided I didn't want to be bothered and stressed with creating bouquets, corsages, and bouts as close to the ceremony as I'd need to work with fresh flowers. So I did hire a florist for those parts, and they were okay (not great...not nearly as great as my sister's flowers turned out)but I absolutely couldn't stomach paying flower shop prices for my reception tables. I looked at a lot of options, and ended up going through Costco.com for a bulk box of gerbera daisies, my FAVORITE! I don't have the exact figure from when we ordered, but they are currently listed at 80 assorted stems for just about $90, shipping and handling included. This is SO MUCH BETTER than the $4-5 each my florist quoted me!

Since we got married out of town, I had them shipped to my aunt's house to arrive two days before the wedding (Thursday). They came in two big boxes, and each flower had a little "hood" to protect the bloom and a "straw" to protect the stem. Per the directions, we removed the hoods (but left the straws) and stacked them all in big buckets of water. They looked GREAT! They perked up a bit with the water, and looked just as beautiful two days later for the wedding. I was a little worried about what colors I'd receive, since you don't have any control, but it was a pretty good assortment - red, pink, orange, yellow - they were bright and fun.


We kept them in the buckets till Friday night when we were decorating (that was awesome - if you can get in early to your site, I strongly recommend it. Totally cuts down day-of stresses). We cut and arranged them into blue bubble vases from The Dollar Tree.

I had great luck with this service, and would do it again in a heartbeat. At the end of the night we actually had people arguing over who got to take them home(I took that as a good sign they looked nice!).

Cinnamon Bat Chips + Fruit Salsa


Mmmmm
I could eat a bowl of these right now.

Cinnamon chips are easy to make, especially if you have a kid or someone to cut out all the shapes for you. Here's the process:

Supplies:
pre-made tortillas in whatever size you want
butter (melted)
basting brush
cinnamon & sugar mixture
baking sheets
cookie cutter

You can personalize these for any holiday, or make them quicker in a generic wedge shape by slicing them with a pizza cutter. But to make bats or any other shape, I suggest a heavy duty metal cookie cutter (I used plastic, but honestly, the times I've made them with metal are wayyyyyy easier!). On a hard cutting-safe surface, cut out as many chips as you want.

Brush each side with melted butter and toss in cinnamon/sugar mixture.

Broil in the oven until crisp. I usually go around 400 degrees, and have no idea how long - just till they get slightly golden and crispy. Too long and they will burn & the sugar crystallize, you'll know.

Tip: Use parchment paper to line your baking sheets and you can save washing in between batches while still re-using the same sheets.

Remove from baking sheet and allow to cool before stacking - otherwise they might stick together.

Serve on their own, or great with fruit salsa (particularly when served in a silver skull!)

There are tons of recipes for fruit salsa out there, I just google them from time to time and choose one based on what I have around. Most are just chopped fruit + some sugar. For this party I made a chunky salsa, cutting the fruit very fine but not mashing it in a food processor - though I've also made the Tupperware recipe using their food chopper, and it's very good.

Thursday, July 30, 2009

The Blood-Soaked Bathroom


I'm in a Halloween state of mind again today, starting to feel a little frazzled about pulling off the party I want when I've yet to have a free moment to start planning...but excited nonetheless.

So here are a few more re-caps of last year's decorative elements - this time a room a lot of people ignore, but one that has tons of possibilities - THE BATHROOM!

We have an all-white bathroom, which sounds great at first - you can personalize it to whatever you want - but in reality, it's like a giant blank screen that every little fleck of dirt and hair shows up on. EEW. Though it's nowhere near the top of the list, I'd eventually like to destroy this bathroom and trade it in for one with under sink storage and multi-colored tile.

But around Halloween, it works great! I picked up a few packs of the gel-cling blood splatters, and they stick to tile, mirrors, and as you can see, even the toilet :) They contrast really well on the white, so I thought the effect was pretty cool. Our Medicine cabinet has 4 light bulbs, and at first I replaced all 4 with red bulbs (I get the compact fluorescent "twirly" bulbs at Walgreens, they are AWESOME and don't break like classic light bulbs), but that was too dark and I didn't want to deal with anyone (GUYS) "missing" and have a mess to clean up later - so for the party I alternated red/normal/red/normal.

I found that the really heavy "drips" sometimes wouldn't support their own weight, I picked up the ones I had tried to hang on the glass doors of the basement shower after they peeled themselves off and plunged to the floor - to be covered with carpet fuzz. The smaller drips were fun but straightening and assembling all the pieces got tedious - they're just gel, so they don't hold their shape when peeled off the plastic, they sort of wilt like picking up a piece of jell-o, and you have to arrange all the "legs" of the more splotchy blood spatter. Some of them had what looked like razor blades embedded - these looked so real, but were just a foil paper!


I packed them all back in either their original packaging or on plastic plates wrapped in cling wrap, I'm hoping they are re-usable for many years to come.

I love decorating the bathroom because people are less likely to notice if it's not sparkling when they have something to draw their eye. The low light helps with this as well :) And the bathroom is generally a relatively quiet, solitary place that people can relax and really look around at your details.

Time Management Tip


I am a recovering procrastinator.

I think a lot of people can identify with wanting to do a million different things, but never quite getting to them. One way I've helped to overcome this is subtly changing my time management.

I'm rarely going to get up early on a Saturday and work on crafts, run errands, or work on the house - sleep trumps those activities every time. But on days where I have a short gap between work and an evening event, I've found that I can be extremely productive if I do one thing: NOT go home.

I learned while waitressing that the pain in your feet and back were never so bad as when you had relaxed for a short time and had to get up again. The same seems to be true with my energy level. If I go home and crash on the couch for 1/2 hour, I'm out the rest of the night. But if I go straight from work to running errands, I can crank out a ton of tasks, even fighting rush hour traffic.

Case in point - yesterday I got off work at 4:30 and had to be to a scrapbooking workshop at 7. In that 2 1/2 hour window I hit Party City and got all the paper goods for my next bachelorette party, Costco to survey menu choices (decided, but did not purchase the ingredients - since I wasn't going home for a few hours...this was a "DUH" moment on my part), Michael's for a couple miscellaneous things I've needed to finish up projects, dinner at Subway, and then off to my workshop.

If I would have gone home, I would have spent more time travelling, unloading, and reloading than I got to spend relaxing, and I would have only had a 50% chance of prying myself back off the couch (or new chairs!) for the workshop.

Confuscious say: Just do it.
SWOOSH

The Wall of Unfortunate Demises


Here's another element from our 2008 "Hollywood Halloween" party. I love trivia and decided to incorporate some interesting factoids on strange Hollywood deaths along one whole wall.

My go-to application for graphic design is Powerpoint, it's just the easiest and most straightforward for me to crank stuff out it. I found a clip art image of a headstone and sized it for 11" x 17" paper (the largest my printer will take). I used a simple text box to personalize each with the name of a celebrity (past and present), their trade (actor, dancer, pope), and their method of untimely death.

I found them through Internet searches of "Strange Hollywood Deaths" and the like. Some of my favorites:

Peg Entwhistle - Actress - Suicide, jumped off the "H" in the Hollywoodland sign.

Elvis Presley - Musician/Actor - died on the toilet

Elizabeth Short - Actress - The Black Dahlia, murder victim

I think I printed out a couple dozen and just slapped them up on the walls with 3M strips (completely removable - no damage to the walls). The gold stars between the rows said "Unhappy Endings" or something like that :)

This was fun, I got into the "mood" of the party researching the deaths, and people got a kick out of reading them throughout the evening. You could also easily convert this to a game - matching, trivia, etc.

Wednesday, July 29, 2009

Bright Bridal Banner


Another fun wedding craft! This time it's a banner for my good friend Al's bridal shower, which is coming up this weekend! The other co-hostesses and I picked a fun contemporary theme of umbrellas, and are using a bright summery color palate. Since the shower will be at a restaurant we don't need to worry about much decoration-wise, but I wanted a few personal touches.

This banner is a quick & easy craft project, and all of the pieces are re-usable and recyclable! Here's how I made it:

I picked up a "basics paper" book of cardstock in the "fun" collection, which are textured sheets in 10 solid colors. They are already cut to 5" x 7", which meant I had very little cutting to do. I made a template from the back blank piece of cardboard by marking the center of one of the short sides, and drawing lines from the corners of the other short side to make a triangle.

I laid the template on the back of each the pages and traced it lightly with a pencil. I then cut the two long sides of each triangle with a fancy scissor for a scalloped edge. That was the most time consuming part, my scalloped scissor was only about 2" to begin with, and for some reason the beginning and end of it don't cut strongly, so there was a lot of short slices: open the scissor, press down, open again, line up the design, repeat a million times.

I also tried to use a pinking shear scissors I'd picked up from the dollar store a while back, and it was total crap. Note to self: good cutting tools are worth it. Cheap ones are not. I cut one triangle with the pinked scissors and went back to my provocraft scalloped scissor. It wasn't great either, but much sturdier with a better cutting surface. I picked up a bunch of them in a drum at Michaels, all different cutting patterns.

Next I altered my template so I could use it cut two vertical slices about 1" long near the top (short edge) of each triangle. This was for the ribbon to thread through. I actually made it through the cutting process just fine, only to stab myself with the exacto knife later on when I leaned on it accidentally. OUCH!

I threaded a thick black cotton ribbon through, which matched nicely with the letters I used - which were a great find! Michaels had these packs of pre-cut paper letters in sort of post-it style pads, with a little bit of sticky tack on the back. A pack of over 300 was under $5, and this is a great deal. Cheaper than stickers, less work than stencils or cutting, and they really look sharp in contrast to the bright colored flags!

Mine is actually 2 pieces, so I could spell out more of a phrase - but I'll keep the exact final product quiet so the bride has a few surprises :)

I put the whole thing together in a couple of hours while watching TV, so it's definitely an easy and quick project, but I think it turned out really cute!

Together the pieces cost:
Paper: about $5 for 40 sheets(I only get it when it's on sale 40% off)so for the 24 pages I used we're talking $3.00
Letters: about $3 for 310 letters, originally around $5 less a 40% off coupon, so less than $0.25 for what I used.
Ribbon: $2.50, also on sale, used all of it (9 yards).
+ 1 Band-aid for exacto injury :)
Price for a cool, crafty, one of a kind & personalized banner: under $6!

Tuesday, July 28, 2009

Neutrogena Anti Residue Shampoo


This stuff is awesome.

I have really thick hair, and though I don't use a lot of styling products, I do have recurring periodic issues with sticky waxy build up.

Gross right?

But it's true. It's not all the time, just off and on, and more often when I have longer hair. I can clearly remember being in elementary school and going to the Aveda Institute as a hair model with another little girl in my Brownie troop. I had beautiful white blond hair, done in a graceful side braid, with a fancy new beaded t-shirt (hey, it was the 80s...you looked like a fool too) but when they unraveled my braid the stylists in training were aghast and couldn't understand why it felt so strange. They insisted it was something wrong with my shampoo (really effective to lecture a 7 year old on her shampoo choice...what kid controls that?), but all I knew was that I was highly embarrassed.

Now days I realized that when I go long periods of time letting my hair air dry (which is most days - blow drying thick hair is wayyyyyyy too much work!), the build up starts, just in the back of my hair. But there is a cure!

I remember my mom rationing this when I was little, the crystal clear shampoo in the tiny bottle: Neutrogena Anti-Residue Shampoo, formerly called "clarifying shampoo," this stuff is amazing. Per the directions you use it once a week, it strips out the build up, and when you go back to your regular shampoo it works even better without that base of residue. I thought I remembered it being horribly expensive when I was a child, but I picked it up for about $4 at Target last night, not too bad for such an impact.

Today my hair is still air drying, but I can already tell it feels better, cleaner, and I'm so relieved. There is nothing like icky hair to make you feel self conscious and down. The smell is a little antiseptic compared to most hair junk these days, but not overpowering.

By the way, I review products and services on here because I like to share my opinions, and possibly give others the benefit of my experience. I don't get paid for any of them, good or bad - not that I'm not entirely open to the possibility - but it just isn't the case unless I've said otherwise. So far, it's all just out of the goodness of my own heart. Don't you feel better trying products someone has tried and recommended? Or skipping ones they don't? That's one of my favorite parts about reading blogs, finding new products or hearing how a "real person" felt about using something.
:)

Today I accomplish #89, Own a set of "Barnes & Noble" chairs!

YAY!

Both the hubs & I have always wanted a set of big cushy chairs, like they used to have at Barnes & Noble before they realized making people too comfortable was just bad for business. Sadly, they're not cheap. But I found a great deal at Slumberland on Sunday night, and now we finally have a set! They are a deep red that goes well with my big area rug, and it makes the space feel so much more livable.


Here is the "before" picture of half of our living room, you'll note it's pretty plain and open and not very usable. Don't get me wrong, a lack of furniture is great for parties, there's nothing to move or protect, but as far as daily living, we just haven't made much use of this room without a lot of seating.


But now...

Drumroll?

Tah Dah!


How great is this?!?!?
I'm desperately coveting ottomans now, but I'm considering this enough to check if off my bucket list - and start using my living room more! Right now I'm procrastinating on going back to work and curled up in one with all the windows open, it's so nice and breezy and sunny. The dog is curled up on the couch slowly pulling all the stuffing out of a canadian goose toy. If only this weren't a weekday, I could sit here for hours!

I'm in love!

Prying myself back out of this chair to go back to work is almost unthinkable...

Custom Mermaid Inspired Sundress


Here is yet another bucket list item I crossed off recently:
#43 Have a garment custom made

When I wrote this list I was thinking the "garment" in question would be a suit or ball gown or something decadent, but as fate would have it, I stumbled into a situation and ended up custom ordering an adorable sundress on Etsy!

If you don't know about Etsy, I'm sorry to fill you in - because you will probably become addicted and spend both hours and fortunes lost in all the treasures. Etsy is an online marketplace for crafters and artisans, where anyone can set up their own shop and sell their handmade, vintage, or craft supplies. It's sort of like Ebay but with set prices instead of auctions, and instead of used crap it's all either new or vintage. So far there's a lot less fraud and crap to get in the way, so it feels much more secure, though I suppose it only takes a few bad apples...

I love etsy.

They also have a special section called "alchemy" where you can essentially post a "want ad" and anyone with a shop can respond to your request with a bid to complete the project. I originally posted an ad looking for a mermaid COSTUME (back way before the Coney Island Mermaid Parade), then in talking with one of the shop owners who responded, came up with the idea of doing a less literal adaptation in sun dress form.

Custom made just for me!

I accepted NancyNeedlesandPens bid, because she had an established shop with a good history, and her clothes looked high quality and cute. She had mostly done kids stuff, but I figured that worked in my favor as far as durability :) It was actually a child's sundress that inspired my design, I liked the tiered ruffles idea. We emailed and I sent her my measurements, design, and fabrics.

I did a drawing of what I was hoping for - tiered skirt, halter top, appliques on the bust, and a low back to show off my tattoo. She found a pattern that accomplished most of that, and we agreed on changes to the back & skirt (less wide). She was fantastic and I LOVE the final product! We made a few adjustments as the process unfolded, and I was very pleased with the final product - the photo above is what she sent me to approve just before she sent it across the country to me (I believe she's in Oregon or Washington - looks like maybe on the water!).

I didn't end up wearing it to the Mermaid Parade, the pull of spectacle and sequins was too great and I decided to go much bigger for the actual festival (and then scrapped that and went in a 3rd direction once I actually got to New York), but I do think this dress is fantastic and I will make good summer use of it. It definitely suits my personality :) and it's all cotton, so completely washable and easy to care for!

Monday, July 27, 2009

Holiday Cookie Exchange


I'm a little late for Christmas in July, but it occurred to me in going through my bucket list post that there are a couple things I've checked off but not featured on my blog. One was #36, be part of a cookie exchange for the holidays.

I think I first heard about this idea from my friend Al, whose family does one yearly and always sounded like great fun. I love to bake, though I'm not very adventurous and for some reason don't know how to bake most of my holiday favorites. A cookie exchange was the perfect solution - everyone can make their specialty, and leaves with a huge assortment!

I've apparently developed this motto in life, "if at first you don't get invited, then it's time to host your own!" This is certainly how I ended up hosting the big Halloween bash (years of scrambling for something fun, it finally became clear I needed to make my own fun!). Sometimes it gets annoying (doesn't anyone want to invite me to a New Year's Eve party, so I don't have to cook and clean on my birthday?) but usually it's a fun experience. It definitely was with the cookie exchange.

I started a few months before the holidays sending out emails to people I thought might be interested, and how I thought it should work. I asked everyone who wanted to participate to send me 2-3 types of cookies they'd like to make, and I'd choose the option that best fit the group in terms of avoiding repeats, etc. I ended up with a lot of interest - ELEVEN people!

I picked the date that worked for most of the group and was about a week before the holidays - this meant people would have their cookies for entertaining on Christmas and the week before. In retrospect, we might move it a little earlier next year, as more people wanted them for entertaining and the parties were generally in the week before that. But all groups will differ.

Everyone was asked to bring 10 dozen cookies (1 dozen for every guest other than themselves) packaged by the dozen in containers they didn't need back (i.e. saran wrap, pie tins, gladware). This didn't sound outrageous to me because I grew up with a mom whose basic recipes were all set for 12 dozen, but if that is more than you can handle you could always limit the number of guests, or bake only 1/2 dozen for each person. I also asked that every participant share their recipe, so we could each build a treasury of our favorites for future entertaining. For those who couldn't make it that evening, I asked that they send their cookies ahead of time, and they could pick up their assortment at the end of the evening or next day.

I got everyone a huge re-usable bag from Costco to take home all of their goodies, and even then they were very full bags! These are great if you haven't tried them - they come in a 3-pack for under $3, have two sets of handles, and are super durable. I use them all the time and I think we have about a dozen floating around out home & cars.
I tagged each bag with a name and set them up on two tables, so as guests arrived they could distribute their goodies into everyone's bags. Boy did it smell GREAT! We each introduced our cookie to the group, drank wine & cocoa, and enjoyed a few snacks and the festive mood. I was excited to show off my decorations for my first Christmas in our new home, and this was such a great opportunity!

As organizer of the exchange, I kept my cookie flavors a secret, and also made a few extra treats for everyone.

The cookies were linzer-style shortbreads, and it was my first time ever making them! This was quite an ambitious undertaking, not only are you making 10 dozen cookies (+ a dozen for yourself) but since they are a sandwich cookie you are really making twice that! I spent an entire day working on these, but they were worth it. There is a shortbread cookie on the bottom, raspberry or apricot filling, and a "window" shortbread cookie on top. I think they look like stained glass and are really beautiful.

And since I cherish my title as "hostess with the mostess", here are the extra treats I threw in for everyone:

Neapolitan cupcakes - two each of chocolate, strawberry, and vanilla

Carrot Cake bites with cream cheese frosting and slivered almonds

S'mores on a stick, peanut butter balls, and dipped pretzel rods.

I probably won't be making quite as many side treats next year (sorry ladies!) but I've heard from several of the participants that they'd love to do it again, and a few who missed out were quite jealous! If you want to go all out, you can read this lady's guide on her crazy cookie exchange (it's apparently a competitive event!)For resources on recipes and ideas for cookies to try, I recommend Joy of Baking which is where I got my amazing peanut butter ball (AKA "Buckeyes") recipe.

We each went home with 10 dozen cookies + all the extra treats, more than enough to share at the office, relatives, and even re-gift. With so many different varieties, even if you didn't like one kind there were still plenty of other options. I know since I have very limited food likes, my husband certainly appreciated having goodies around I wouldn't normally bake.

Sunday, July 26, 2009

Bucket List


I've never seen the movie, but I like the idea. I am so horribly jealous of Maggie over at MightyGirl who somehow got Intel to "sponsor" her version of a bucket list, her "Mighty Life List." Can you imagine someone footing the bill for you to take time off and just follow your dreams? I can't even wrap my mind around that one, it must be amazing.

My dreams aren't quite as lofty as hers (I never even knew there WAS photo-luminescent plankton)but a few years ago I did put together my own list, and here are the first 100 things that came to mind. I've managed to check off a few items, even without a "sponsor." I hope to check off a few more by the end of the summer, including one to be announced this week! :) But you'll just have to wonder unil then...

Bucket List
In no particular order, 100 things I think I should try before I die…
Number Item Date Accomplished
1 Start my own business
2 Have a child
3 Wax my eyebrows-Feb 2009
4 Get a full makeover
5 Paint something on a canvas
6 Take a class at the actual Wilton School
7 Speak Swedish in Sweden
8 Go to a Hot Air Balloon festival
9 Write something that gets published
10 Learn how to make stained glass
11 Re-tile my bathroom
12 Learn to take great photos and get a “real” camera
13 Sew my own clothes
14 Make a quilt
15 Makeover an entire room in my house
16 Buy a piece of “real” jewelry
17 Serve as Grand Marshall in a parade
18 Try a bikini wax
19 Have elective surgery
20 Get a pedicure
21 Attend a charity ball
22 Sky dive
23 Buy a brand new car
24 Take a road trip without an itinerary
25 Cook a turkey
26 See the Martha Stewart Show live
27 Start a craft club
28 Blog publicly-June 2009
29 Learn to knit
30 Give a surprise party
31 Get a surprise party
32 Leave an anonymous $100 tip to make someone’s day
33 Win a costume contest
34 Gamble in Vegas
35 Watch a jazz funeral parade in NOLA
36 Be part of a cookie exchange for the holidays-Dec. 2009
37 Go to Hawaii
38 Sleep on a beach
39 Join a “bouquet of the month” club
40 Win a big prize
41 Go on a roller coaster tour
42 Get a full back tattoo-Spring 2009
43 Have a garment custom made-Mermaid Sundress - Spring 2009
44 Commission a painting or other artwork
45 Graffiti
46 Get a passport
47 Be an extra in a movie or TV show
48 Have zero credit card debt
49 Run on a spinning log like in lumberjack competitions
50 Own “land” somewhere
51 Donate a chunk of hair to locks of love
52 Feel financially stable
53 Hang Xmas lights around the outside of my house
54 Have Halloween yard decorations that draw a crowd
55 Ride in a limo
56 Find the perfect “little black dress”
57 Make an elaborate gingerbread house
58 Learn how to work with rolled fondant
59 Go to the mermaid parade at Coney Island-June 2009
60 Get a master’s degree
61 Participate in a poetry slam
62 Build a full size playhouse/treehouse
63 Trace my full family tree as far back as possible
64 Be proud of my government
65 Visit every state in the U.S.
66 See a professional production of “Blood Brothers”
67 Be a bridesmaid or matron of honor Aug. 2009
68 Start an Xmas tradition and carry it on forever
69 Host an exchange student
70 Have a photo taken of myself that I really like
71 Donate blood, plasma, a kidney or part of my liver
72 Make a legal will
73 Sleep in a castle
74 Open an Etsy shop
75 Get an embroidery machine
76 Perform in a play
77 Coach a state champion
78 Go to a fun convention – candy, tattoo, crafting, etc.
79 Own a giant bathtub you can actually soak your whole body in
80 Have a real (snail mail) pen pal
81 Have a signature recipe for something
82 Host a party with a live band
83 Buy CDs, bonds, and other secure investments
84 Diet
85 Go to SXSW
86 Join a protest
87 Fly on a trapeze
88 Learn how to silk screen
89 Own a set of “Barnes & Noble chairs”
90 Go to a film festival
91 Collect seashells on a beach
92 Whiten my teeth
93 Eat a multi-course meal at a fancy restaurant
94 Go geocaching
95 Organize my important documents
96 Keep records – create my history
97 Surf
98 See the Northern Lights (not the casino, the natural phenomenon)
99 See an opera, a ballet, and Cirque de Soleil
100 Get my car detailed

Friday, July 24, 2009

This weekend: Bridesmaid Dress Alterations!


Here is the dress I ordered for my wonderful friend's wedding in just over a month, though shown on a woman-child less than half my size. Mine is in Mediterranean (slightly darker/greener) and will have the spaghetti straps intact. I feel like the rusching on the bodice looks more even and "striped" in person, not quite the bunched texture on the ad, but it's very comfortable and feels well made. My project this weekend is to determine if my mother can make the necessary alterations, or if I need to take it in somewhere - fast! Barbie couldn't fill this top out - I considered stuffing, but I could fit a Christmas ham in there. Better to seek alterations than risk anything falling out at inopportune times. Especially considering the reception features a polka band!

My friend is the coolest bride imaginable. Rather than dress her 4 attendants in matching outfits which flatter only one or none of us, she sent us out into the world with only the instructions to find a dress "in some shade of blue, and not floor length."

AWESOME.

This means that each of us, with our widely varied body shapes and skin tones, picked a dress that made us feel pretty and confident and comfortable. She's also letting us determine our own hair, makeup, jewelry, and shoes - which is such a thoughtful way to make your wedding party feel at ease. Instead of being bound to a certain payment, we can each set our own budget according to our needs and preferences. I found my shoes for the ceremony

on ebay for under $30, and plan to wear a necklace I already have. I am getting my hair and makeup done because that greatly reduces my stress - and my hair doesn't like to play along, so professional help is well worth it. Then I'll switch to some cheap flats for the polka party (I'm hardly graceful enough to walk in these 4" suckers, let alone polka. But I'm intent on looking statuesque and if nothing else, it'll force me to walk slower down the aisle).

I did a similar set up for my wedding, though on a smaller scale - I had just 2 attendants, this bride-to-be was my Maid of Honor, and lil' sis was my bridesmaid. Lil' sis actually picked her dress first, we just set out to find something knee/tea length and blue. She picked a royal blue Alfred Angelo, and the MoH decided to get separates from same designer in the same fabric. They looked stunning! I really think it makes so much more sense to let your wedding party have a say in the expensive apparel they have to buy for your wedding, and having been on both sides of it now, I think it makes you feel a lot more special and involved in the process when you have a voice in the matter.

Now if only I can master these heels!

Thursday, July 23, 2009

Halter Top #2


In honor of today's 85 degree temps, here's another halter top. I made it from the same pattern as before, though for this one I took a chance at altering. I completely removed the upper back piece to create a more open back and show off my mermaid (it wasn't done at the time I took these pics). I should probably add some elastic along the upper edge of the back piece to keep it more secure, but for a breezy cotton summer shirt, this was again pretty easy to throw together, and a good pattern to experiement with.

You'll recognize the fabric from the aprons I made for Al & lil' sis too, I can't help it - I just think it's adorable!

Wednesday, July 22, 2009

Forecast: Wedding Showers!


This week I'm working on more wedding-related crafts, this time for one of my best friend's bridal shower the weekend after this! I'm really excited and think this will be a fun event. I'm throwing it jointly with the two other bridesmaids, and we've picked a classic umbrella image as our "theme."

The invitations were amazing and I should post them here sometime, one of the co-hosts is a graphic designer and rigged up a paper umbrella that you actually open to reveal the invite text! They were ADORABLE.

For my part, I've completed these name tags with a great die-cut umbrella:


They have a pin back for ease of wear, and the names will be printed on a label maker (black on white tape) so that they are visible over the pattern. Each person will select their own name tag (and affix their name label) and the number on the back will correspond to various games & door prize drawings.

These were made from a Quickutz die I got off ebay but recently found at Archivers too (for a better price even!). It works in my Cuttlebug, though when I use heavily decorated papers I'll run it through a couple times before trying to pry the tiny pieces apart.

The paper is various glittered cardstock from a DCWV "Fun in the Sun Summer Glitter mattstack" I picked up at Joann's during a 40% off sale (they go on sale every other week, or you can use the coupon from the weekly flier - never pay full price for anything at Joanns!)

I loved the bright glittery colors of these papers, aren't they fun?

I punched out a million of them, and then went to work switching up the handles and tops so they coordinated/contrasted. I think they turned out really cute!

Also on the same die is the "closed" umbrella, which I haven't decided on a use for yet, but have a stash of them waiting if I do:

These are a little more tedious to put together due to the small pieces for the point and closure, but it's those details that really make them cute and polished.

This is the same die cut set I used on my sister's bridal shower card here and here and you could definitely use it for baby showers, get well, and springtime miscellaneous cards. I've definitely gotten my money's worth with all the wedding showers just this year!

Tuesday, July 21, 2009

A few more mermaids


Now that I've got this handy-dandy external drive, I'm just a posting fool. I see I'm still getting some traffic from the Coney Island Mermaid Parade boards, so I thought I'd throw up a few more pics - too see them all, click on the "mermaid" label at the bottom of this post and you'll get all of my posts related to mermaids.


Pretty Pantry Project, or An Ode to Tupperware


I should point out that this is not the current state of my pantry, this was taken back in April when I completely cleaned and organized our tiny little kitchen and took this photo as proof that it was, at least at one point in time, beautiful.

I love Tupperware. I love the product, the idea, and the whole story of how a scientist with an idea and an outgoing divorcee with a penchant for parties came together to create an empire, and then when that divorcee started getting too much of the limelight, the scientist fired her and a significant section of the magic disappeared. The 1950's were a decade of wonder and automation and relative ease. All of the worst foods we cling to today were created in the 50's - sugar cereals, TV dinners, M&Ms, chex mix - if it was highly processed, it came from the 50's. Mmmmmm.

Suffice it to say I am enamored with Tupperware, a trait likely gained from my mother whose pantry I should also steal a pic of - she could be in Tupperware advertisements. While most teens fight with their parents about curfews and allowance, my mother and I were locked in an epic battle of "you'd better return this Tupperware!" and "This better not end up in your locker!"

But now I have my own Tupperware. And it is wonderful.

A small 1940's kitchen provides a few challenges as far as storage space, and Tupperware was my answer. We have two sets of cupboards, one full of dishes, and this one which must store all of our non-refrigerated food. The top shelves are fairly inaccessible except with a chair, so we needed most of our daily things on the first few levels. There is a reasonable depth available, so I started with the "Super Oval Pantry Set." These are the perfect depth, and stack so that various containers end up the same heights, perfect for a cupboard. They are partially transparent so you can tell what is in each one, and the Tupperware seal means they are air tight and everything stays fresh.

We also had picked up several "cereal storers" along the way, so I have a collection of the original clear, black, and red seals, but they all do the same thing - they store a whole box (or most of a giant costco bag) of cereal with an air-tight seal, so much better than a cardboard box. These are all lined up on the 3rd shelf with the pancake mix & other breakfast goodies.

On the high shelf I decided to store my baking staples - flour, sugars, chopped nuts, etc. Since I needed to hold a bigger volume but didn't have as much height on the top shelves I went with the "Modular Mates Rectangles" set. These are great because I don't use them very often, but know that the Tupperware seal keeps it all fresh in between.

Tupperware isn't cheap, so it was a little hard to make such an investment initially - but it lasts virtually forever. If your Tupperware breaks down or has a defect, the company will replace it for you - even years later, and believe me, my family has taken advantage of that policy and they really come through. Having everything in my pantry organized and accessible was well worth a few hundred dollars up front, now everything has its place and I'm not losing food to bad containers, forgetting it's mashed behind something else, or wasting time searching for stuff that's hard to find. It makes baking a lot more fun too.

Need to order some Tupperware? My current "Tupperware Lady" is Elda Hanson, I met her through some vendor fairs in the burbs and she's great - always makes it worthwhile to order through her, she never pressures me to have a party, and she sends out good deals every once in a while, which is how I bought my initial pantry set. elda@my2.tupperware.com

Monday, July 20, 2009

Forever Floral - The best flower shop around!

I don't buy or receive flowers very often, but my sister's wedding reminded me of just how wonderful my favorite flower shop is - Forever Floral.


They have two locations, one on Foley Boulevard in Coon Rapids, and the other on Hwy. 10 in Ramsey. I have never once been disappointed in an order from them, and they are my official "go to" flower shop for corsages, sending bouquets, or referring brides-to-be. So of course I referred my sister to check them out, and she can now officially say they were wonderful too!


I first fell in love with Forever Floral (and their super owner, Jackie) when I was preparing for the Breast Cancer 3-Day walks. We partnered both years on a special mother's day bouquet - here was one of them:

They created this special "Think Pink" arrangement and donated a portion of each one ordered to the 3-Day. I personally ordered them for all our mothers & grandmothers, and everyone RAVED about them! Jackie was so nice and truly has a talent in putting together beautiful things.

They are also FANTASTIC at customer service - my sister was able to pick out all of her wedding flowers in under 10 minutes, and had a quote that same day that was very reasonable - in fact, I'm pretty jealous that she got more + nicer flowers than I did for a much better price! And we even got married in a "cheaper" city up north. Suffice it to say, Forever Floral is a good value.

She asked for simple white roses for the maids, partially open:

How beautiful are these?!?! The stems were all wrapped in ribbon and they were delivered each in their own vase to keep them hearty until needed - at no extra charge, that is just part of their service.

The bride's bouquet was perfect:

She also ordered a matching wired rose for her hair, after the ceremony she removed her veil and changed her hairstyle so she had a flower over one ear - well, this great shop sent TWO flowers, since it was a summer wedding they wanted to be sure nothing wilted before she changed into it. So thoughtful.

And all of the corsages and boutonnieres arrived tagged with who they were for and pinned to a board with extra pins for the hard to attach ones.

As a personal attendant, you can't find a better set up than that for distributing all of the various corsages and boutonnieres to wedding party members, parents, readers, etc. - and they even go so far as to put black pins with the boutonnieres (so they blend with the tuxes) and white pearl ones with the corsages. Pretty to the last detail!

I can't say enough about this shop, they've never disappointed me! Beautiful products, great service, and a really good value. A+!

Another Wedding Down, various craft projects completed!


Good morning world, I'm back at work after a big family wedding weekend, successful in all of my personal attendant duties but one:

Not a good idea to leave the Unity Candles in the car after the ceremony.
Even on a cloudy day they apparently melt to your upholstery.
Oops.

But if that is our only tragedy, I'll gladly replace a couple of taper candles :) Everything else was beautiful and went smoothly, and I think the bride & groom will agree it was another magical day. And, an extra special bonus, lil' sis gave me a very special thank you gift of a portable hard drive, so now I'll actually be able to update this more effectively as I can carry my photos between computers with ease! Thanks L! :)

Craft-wise I don't have a lot of great photos, but we collaborated on a few simple touches that really personalized the reception hall and I thought I'd share those - keep in mind that my sister and I are rumored to be complete opposites, whereas I love all things covered in glitter & jewels, she opts for a more simple and sophisticated aesthetic, and since it was her special day we all went along with that :)


The table runners were all made by my mother in a blue & white linen, it added just the right "pop" to the table which didn't have traditional centerpieces but instead a cheese & cracker display ready and waiting as soon as guests arrive. Brides, this is a great trend and so thoughtful for your guests - we'll happily wait for your grand entrance if you only just FEED US! I know I'm always tempted at weddings to grab a Happy Meal between the ceremony and reception, but my lil' sis had cheese plates and hot hors d'oeuvres waiting so we all were able to get a bite in before the wedding party even arrived!

Also on each table were two little table tents that listed the beverage options for the evening. This is another really helpful touch I'd suggest every bride & groom start doing - let us, your treasured guests, know what is going on! This simple card indicated what was hosted during the social hour (beer), during dinner (wine, milk or tea), and for the whole of the evening (soda, coffee). As a guest, I know it's always awkward to go up and ask the bartender what/if anything is hosted, and who doesn't hate paying for something only to find out you'd have been perfectly happy with what is hosted, or avoiding something altogether when you find out later there were hosted options available. Ugh. Anyways, I helped to print and assemble all of these simple cards, and I think they really helped guests know what was going on. There were two small signs on each table and two larger ones at the bar.

We also made the table numbers, pretty simple yet clear and effective. Blue numbers printed on white cardstock, cut and clipped with a corner rounder, and mounted on navy cardstock. The venue provided the stands and even set them up. Simple is nice on a busy day!


The same simple aesthetic was carried through the place cards, which also had the meal choice on the reverse for each guest. The meals were printed on clear labels for ease of application, and they worked great.


The same material used for the table runners was used to make a cake-style card box. We rocked that out in just a couple hours one afternoon, using hat boxes, rubber bands, duct tape and ribbon - amazing right!?!? For my wedding I had painstakingly cut and folded and glued fabric to get a perfect even finish, when it turns out bunching it and doing things on the quick take a fraction of the time and still looks great. Since nobody really keeps the giant box after the big day, it doesn't have to be able to endure hurricanes, and this was just right.

In lieu of a guest book, they borrowed an idea from the next bride/my maid of honor (whose wedding is now just over a month away!) and had guests sign wine bottles that they would then open on their upcoming anniversaries. This was an adorable and very practical option (who really reads their guest book?)and I think nearly every guest complied. They were set on a table as you entered the room, and then when the dinner started I went from table to table to make sure everyone had signed, and those three bottles were pretty covered by night's end! A lovely memento. Here's a crafty tip that lil' sis came up with all her own: the pens are Sharpie brand paint pens, and they were great! I exploded one getting it started, but the other 3 worked fine, and the white paint showed up great on the dark bottles (red wines).

Congrats lil' sis and new bro-in-law, and best of luck in all your upcoming adventures!

Friday, July 17, 2009

Goodie Bags


I love goodie bags. Adore them. Feel that they are unfairly relegated to children's parties and the academy awards. To me, a party is not complete unless you take home party favors.

That said, some of my closest friends are quite minimalist and can't stand taking home "useless junk", so there's that to consider as well.

And then disregard :)

These "schwag bags" were for the Oscar's party I threw as a fundraiser for the Roseville Women of Today, they were glossy black gift bags snagged on clearance at the Taher Retail Store (the folks behind a million party supply catalogs, including M&N International). They were stuffed with all the trivia games for the night - rolled into tubes and tied with a ribbon, a pencil to complete them, a ballot to guess the night's Hollywood winners. Gold mardi-gras beads peeked out to carry on the black & gold theme, and inside were movie-themed trinkets from Oriental Traders

Clapboard keychains - these were junk. Cheap, yes, but I'm sure nobody held on to them. Not recommended. I don't even see them sold by themselves anymore, but you can see them in this "party pack" they put out.

Movie Mints - these were fine, edible favors are always good.

Mini Neon Clappers - to "cheer on" your favorite stars. I love the larger version of these, but the minis are junk. Too small to actually make any noise.

We also had coupons from local businesses, some of which were really great deals.

In general, this wasn't my finest batch of goodie bags, but considering the event and budget (fundraiser) they still made an impact. And they looked delightful all lined up waiting to be distributed :)

Thursday, July 16, 2009

Unity Candle Ceremony - our twists


The wedding season is in full swing, with one bachelorette party down and a weekend of rehearsals & weddings ahead, so I haven't been making much this week. Instead I thought I'd showcase another DIY project from my own wedding a few years back - Unity Candles.

Actually, this isn't really about the Unity candles themselves, which I can't even seem to find a photo of, but rather the candles every one of our friends and family held and lit during the ceremony as well.

In a traditional Unity Candle ceremony, two pre-lit tapers are used to then light a single pillar together.

In our ceremony, the ushers distributed candles (with protective drip cups) to every single person in attendance, while a reader explained our thoughts - a wedding is a joining not only of two people, but of two families, two circles of friends. These people are now united in the new group, and figure importantly into the relationship of the couple.

The best man and maid of honor lit their candles from pre-lit candles on either side of the Unity candle. They then turned and lit the candle of the bridesmaid/groomsman next to them, and so on until the entire "audience" was holding lighted candles. The ushers lit their candles from the last guests, and brought their candles forward for the bride & groom to light their own. From that flame, which had essentially been passed throughout each of our guests and loved ones, we lit the single candle representing our new life together.

During this time a friend played a viola solo...several times over. My one change if I were to do this again would be to have the wedding party light the candle of each aisle-seated person, so that more candles are being lit at once and it goes exponentially quicker. Technically this means that the same flame isn't passed throughout the group, but would greatly expedite things, which is a valid trade off.

There was some trepidation about whether we would set off the fire alarms blowing out 100 candles at once, but we were in a cement aquarium lobby with a huge waterfall behind us and 3 story ceilings, so we took our chances - and were fine. I don't even remember it being smokey at the end of this part.

Here's what (I think) we used for the "passing candles"

blue and white candles from IKEA
these say they don't drip, but I wasn't taking chances having to peel wax off clothing or venues, so I also bought cups similar to these, though not at this store - at the time I was looking, I couldn't find them very many places so I ended up getting them from some gospel mission in the south west - a quick google search now shows a lot more options.

Prior to the wedding I put all the cups on the candles, and split them into two big baskets for the ushers to distribute easily.

Here was the reading, complete with "stage directions":

(Reader begins reading, as ushers begin passing out candles. Start with Wedding Party FIRST. )

“At this time we will symbolize the joining of Bride and Groom's lives with the Unity candle ceremony.

Bride and Groom believe that a marriage not only unites their two lives, but those of their unique circles of friends and family as well. While you may have arrived here today as friends or family of one, you will undoubtedly leave with ties to them both.

There are three candles on the unity stand. The two lower candles represent each Bride and Groom individually. Their light is bright and distinct and unique. These candles will continue to burn just as Bride and Groom will continue to retain their diverse qualities.

These flames will now be passed throughout this gathering of friends and family. Please rise, accept the flame from your neighbor, and continue to pass it along until it has traveled throughout the room. Then, from the flame each of you has played a part in lighting, Bride and Groom will together light a new flame to symbolize their new unity. This flame will be the tallest, the brightest, and longest burning, as it has been supported by so many.”

Violist START SOLO

(Best man and the maid of honor light their candles from candles on the unity candle stand.

Maid of Honor passes to Bridesmaid, Bridesmaid passes to front row, etc.

Ushers get from back row and bring forward to Bride and Groom

Bride and Groom light new flame together.

When soloist is finished, and the new candles are lit, reader continues)

“As you extinguish your flame, please take a moment to make a wish for the bride and groom. You may be seated.”

Monday, July 13, 2009

Bachelorette Bingo


For my sister's bachelorette party the hostess asked me for any entertainment ideas I had, and I volunteered to come up with a game for the evening. I personally cannot stomach the "suck for a buck" type of games where the bachelorette encourages strangers to make sexual advances in return for money, or the variations of this "game" - and I KNOW she'd be pretty uncomfortable with them as well, but I also didn't want something completely vanilla and boring.

So I came up with Bachelorette Bingo, where everyone gets to participate (if they want to - nobody is forced) rather than just the bride, and everyone gets to choose their own level of participation rather than being "dared" or surprised with uncomfortable requests.

The idea was rather simple...but putting the cards together was surprisingly difficult! I kept finding sites that were SELLING lists of bachelorette dares, but few that had them for free, and of those, there were even fewer that I would ever consider doing (Sorry, as a married woman I just would never feel comfortable asking a guy for his man panties, money, or any physical contact. Who does this stuff?!?!?)

I went round and round looking for an acronym, and finally came up with "DIRTY!", that fit my theme and the categories worked out. Each column was a theme:

D= Drink, a list of alcoholic beverages and shots with graphic sexual names - no, I didn't invent these drinks, so don't blame me for the names (MOM!). You can find them on many Internet sites and in a lot of newer bartending books, I picked them up here.

I= Info, sort of like the "truth" category in Truth or Dare, where you share things about your own life & experiences.

R= Risque, as luck had it this was the shortest column (I put in the traditional free space), and that was great because it was the hardest for me to come up with ideas for. My problem is that I myself am not very risque, but didn't want to come across as completely boring, so some of these are even out of my comfort zone, but guess what? That's okay! You don't have to do any of them, and you can still win the game without doing anything from that category. I refused to put on anything illegal or dangerous or explicitly sexually harassing (you wouldn't believe how many of the pre-packaged games think its a good idea to dare people to grab/brush/fondle or otherwise inappropriately violate strangers! If these were males on females, I doubt it would be laughed off in the same way).

T= Talent, and I tried to mix these up. Singing, dancing, telling jokes, etc. I avoided acrobatics and anything that would piss off the waiters and waitresses too much (having been one for so long, I empathize when some idiot thinks its funny to dance on the bar).

Y= YF2B, do you get it? I had to resort to txtspeak, or license plate language for you older readers. Did you sound it out? WIFE - TO - BE! This category is all about celebrating the bride.

I made my bingo cards in powerpoint and sized them to fit 4" X 3" plastic badge holders, like the kind used at conventions. I picked up a couple packs of 10 @ Staples for around $4, and attached gold mardi gras beads I had on hand to be the neck straps. I did this with a few inches of gold foil ribbon, tied in a knot and then curled. This way people could keep them on and play throughout the night hands free, wouldn't lose them from bar to bar, and they were slightly waterproofed in the holders. I got small star stickers to mark the completed tasks - the bride was in charge of verifying all bingos. I also created a recipe card of all the dirty drink recipes so that confused bartenders had a resource if they hadn't heard of one before, and I tucked that in each pouch behind the bingo card. The final product was the picture at the top of this post.

I wasn't scientific in my randomizing of the tasks within the squares, but I did make sure each card was a little different. Here is one page of them (there were 3 pages for a total of 18 different cards, each page had slightly different tasks and within each page the tasks were in different squares).


The prizes for a bingo were the chocolate & peanut butter penis pops from my earlier post, and quite a few people went for them right away - it ended up being a fun ice breaker. We were also lucky to have a gorgeous night and patio seating, so good times all around.

***UPDATE: Bachelorette Bingo cards available now in my etsy shop! Click here.
reactivated May 2012

Heather’s basic cheesecake recipe:


I was slow to come around to cheesecake, and truth be told I still don't much like cream cheese, but I have grown to love cheesecake nonetheless. We even had cheesecake for our wedding cake, which I drove up to Duluth from Muddy Paws in the cities. I've already written about how much I loved my wedding cake in this post, but let's face it: buying cheesecake is expensive.

MAKING cheesecake is not. Seriously. I can't quite figure out why a cheesecake costs $40 from a bakery, and under $5 to make - nice profit margin I guess! I don't claim this to be anywhere near as good as Muddy Paws, but for a more limited budget it's an easy, impressive dessert I've had a lot of luck with. Here's what I do:

Graham Cracker Crust:
I used a Keebler Ready Crust in the “2 extra servings” (10”) size, mostly because I don’t own a pie pan and it’s great for parties not to have to worry about bringing a container home. But if you want to go totally homemade or if you want to do muffin sized cheesecakes, an easy basic graham cracker crust is:
• 1 & ½ cups graham cracker crumbs (self crumbled or store bought)
• 1/3 cup sugar
• 1/3 cup melted butter
Mix dry ingredients first, then add melted butter and press into the bottom of a pie pan or muffin tins to your desired thickness. Bake at 350 for 8-10 minutes. Cool before filling.
Variations: you can really play with this a lot since it is so basic – add more sugar, cinnamon, allspice, etc. We actually like this crust BETTER than store bought, but I'm too lazy to make it most of the time, and again, I have no pie pans, so I've only done it when I accidentally broke the initial store bought crust (and re-used the pan it came in)or when making mini cheesecakes in cake pans or muffin tins.

Cheesecake
• 8 oz cream cheese (2 packages) – room temperature
• 2/3 cup sugar
• 2 eggs
• 1 tablespoon lemon juice
• 1 tablespoon vanilla
Beat the cream cheese on medium speed until fluffy. This is the most cumbersome part – I use a stand mixer, my amazing original 70's harvest gold kitchen aid from the in-laws, but still have to repeatedly clear out the beater to ensure it is whipping and not just stuck inside. This takes much longer if your cream cheese is at all cold - room temp is much better.
Slowly mix in lemon juice, vanilla, eggs one at a time, and sugar. Continue to beat until smooth.
Pour into crust, bake at 350 for 30 – 35 minutes, or until center is set. Overcooking will crack, but still taste good.
Cool completely then chill – preferably over night. Top as desired – fresh fruit, fruit compote, chocolate syrup, whipped cream, white chocolate curls, mousse, etc.