Showing posts with label Tutorials. Show all posts

Thursday, June 09, 2011

Romp in the Swamp Party Links - Halloween 2010


If you are looking for info, pics, tutorials, and inspiration for a Louisiana-themed party, here are all of the posts on my 2010 Halloween Extravaganza, "Romp in the Swamp." I've had the links in my sidebar as I worked on writing everything up, but now that we've moved on you can either click on the NOLA label, or one of the posts below:

Voo Doo Doll Invitations

Decorations:
Gator Farm (bathroom)
Talbot Strawberry Topping
Fangtasia (basement/bar)
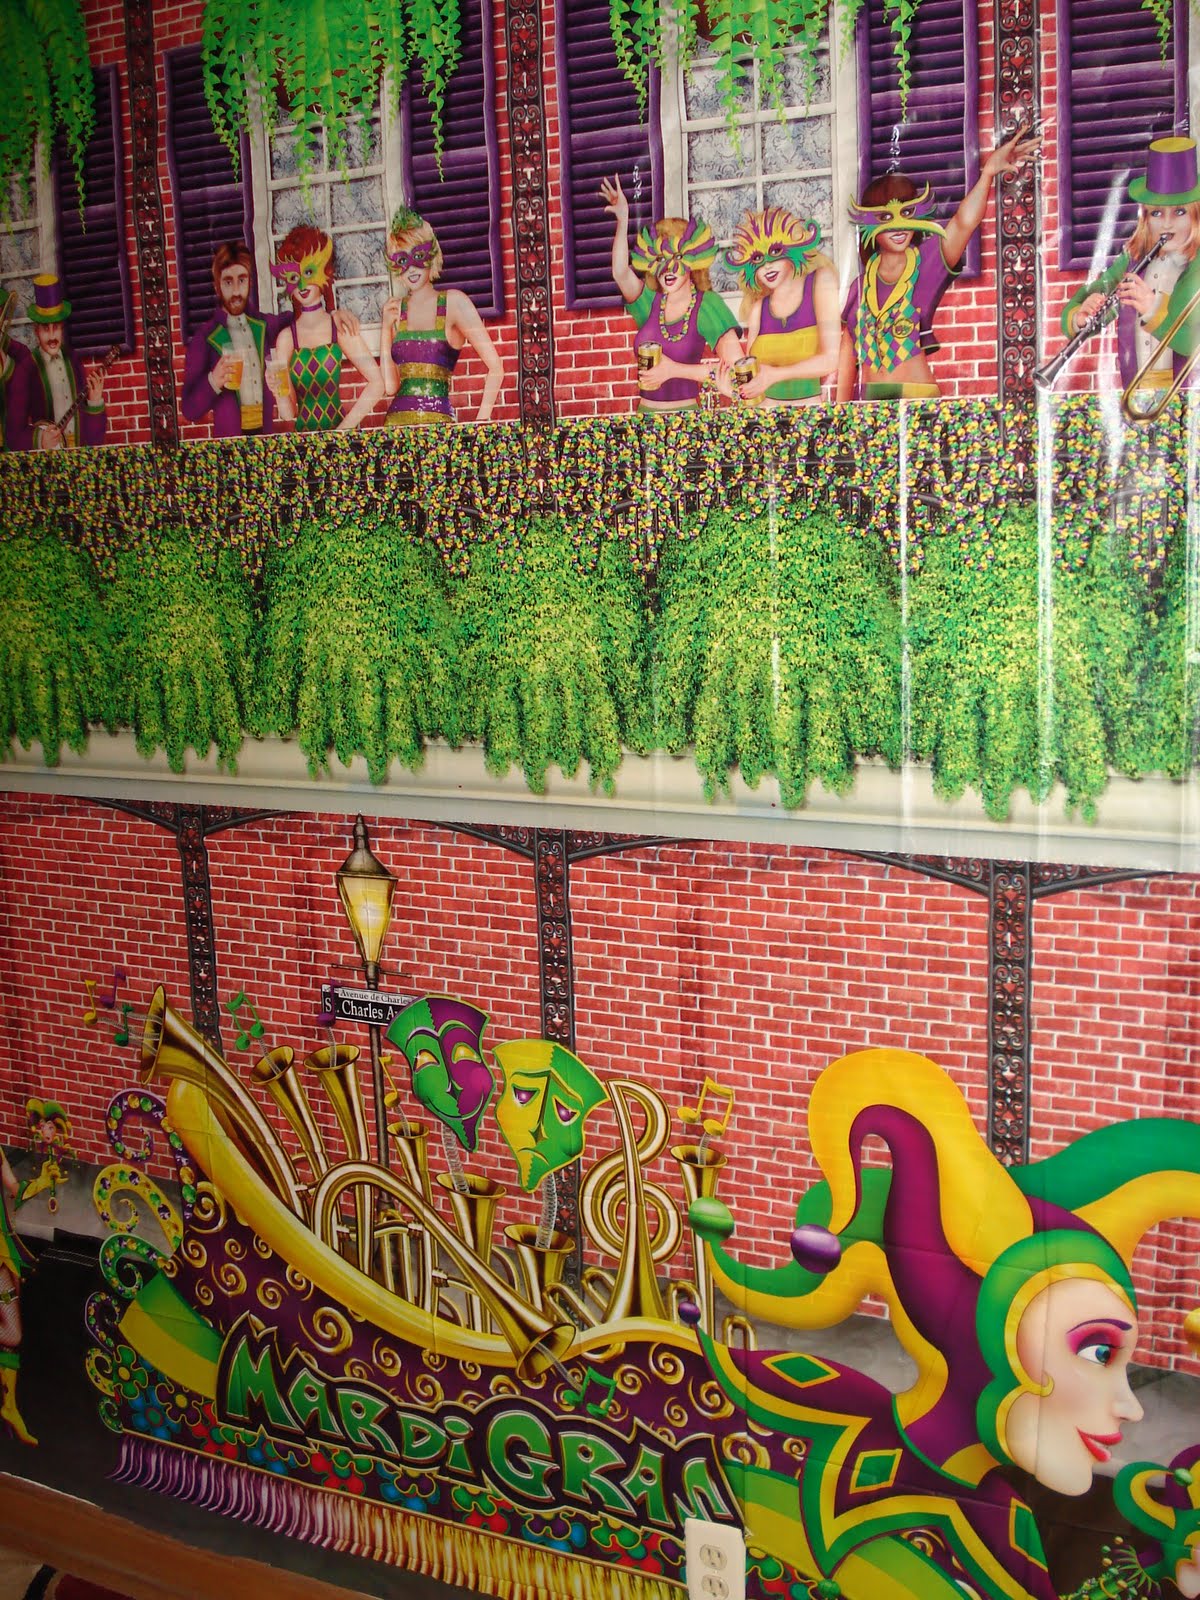
Mardi Gras (living/dining room)
VooDoo Shop (nursery)
Using a "Scene Setter" (tutorial)

Recipes - Confetti Rice, Creole Mustard Dip, Swamp Juice Punch, & Crockpot Bananas Foster

Entertainment: Palmistry, Tarot, & Psychic Readings

Real Costumes:
Me & the Hubby (Mardi Gras Queen & Hillbilly)
Mardi Gras Themed Guest Costumes
Other Louisiana Themed Guest Costumes
Sharktopus

Costume Idea Posts
General/Preliminary Ideas
Vampire Hunters (Female)
Ideas Using Black Contacts
NOLA Celebrities
BP Oil Spill
New Orleans Saints
Mardi Gras Ball
True Blood's Sookie Stackhouse
True Blood - Supporting Characters
HBO True Blood Costume Giveaway
Shifters, Weres, and Wolves
Fortune Tellers, VooDoo Priests/Priestesses, & VooDoo Dolls
Re-Purposing Graduation/Choir Robes
Hillbillies, Bayou Folk, and Swamp Creatures


Pre-Party Info Posts
Theme Announcement
Entertainment Announcement

Menu Previews:
Food
Sweets

Wednesday, December 01, 2010

Romp in the Swamp Louisiana Halloween Party - Mardi Gras Scene Setter

I was REALLY pleased with my "Scene Setter" purchase, it worked perfectly for our space and completely brought it to life. It also made a GREAT background for photos. I started by taking down all our framed art (though I left the tiny nails & hangars - not worth messing with them) and moving the couch so I had a big blank canvas:


The scene setter comes in 2 main rolls, each 4' high. The top roll is here, the bottom roll is here. When I say "rolls", I'm being a little generous - it would be better if they were actually on rolls like the gossamer, but they're really sort of folded. This means they have some creases, which is annoying, but for the price, it's still a great deal.

For ease of keeping things straight, I decided to line the top up with the coved ridge of our wall/ceiling, so I knew I wouldn't use the full 8' height, but that was fine. I used blue painters' tape to form a line of tape curls all across the top of the room .


I tried to alternate directions with the tape, though I have no scientific reason for this, I just feel like it holds better.


Then I carefully hung the top section of the print across the whole length of the room, smoothing it along the tape curls so it didn't pucker or pull. It's helpful to have 2 people do do this, but I did it solo & 7 months pregnant, so it's not a huge deal since everything is light and I wasn't up that high.


Next it was time to add the 2nd roll. The bottom panel has the archways on it, so you don't want to let the top hang over too far and cover all that up or it will look awkward. To get the right vertical alignment, I temporarily folded the top panel upwards and secured it to itself with a little painters' tape so it didn't get in the way. I ran another row of tape curls in a straight line about 1-2" above where the top panel would end, and then hung the bottom panel, careful to line up the arches/posts horizontally as well.


I let down the top panel to hang over the bottom slightly, and used double-stick tape to secure the bottom edge of the top panel to the top of the bottom panel where they overlapped. I had a little excess length at the bottom of the lower panel that I just cut off, and ran more blue tape curls along the bottom edge of the wall to secure it fully. I cut around our vents and electrical outlets too.


I even turned a little bit of the corner with the scene setters, and then cut around the archway as needed.


Once the main pieces were up, it was time to embellish! I bought a the add on sets of revelers, lamp posts & decor, and parade floats. I didn't realize it when I ordered, but these are also on big sheets of vinyl:


So it does take a fair amount of time to cut them all out. You don't have to be exact, because the background is clear, but you want to remove most of the extra weight. I used clear double sided tape to adhere the embellishments to the backdrops:


They were SO CUTE! You really get a lot for $3.99, I had enough for every veranda on the long wall to have some revelers, and a few more over the fireplace. There were several designs that were alternated. I love these frat boys:


I repeated the same process with the lamp posts, Mardi Gras floats, and stilt walkers, being conscious of layering & perspective when necessary (i.e., should the floats be going in front of or behind the lamp posts?). The clear double sided tape was perfect because it didn't really show, and it held tight. I didn't use all the embellishments - other than the lampposts, I didn't use anything in that set, but it was still worth it for the lamps. I used some of the stilt walkers and clowns on the walls elsewhere in the house too. The final effect:


Voila! Let the wild rumpus begin!


It took me a LONG time to put this up, I pretty much spent 9 solid hours between this and all of the hanging decor in the living room, but it was totally worth it. Everything came down really easily too - the vinyl peeled right off of the painters' tape and I was able to roll everything up to use again if I want. I would definitely recommend these scene setters, and will probably keep using them in the future when they fit my themes. The total cost for decorating this whole wall + the additional patch over the fire place (and some more left over - each scene setter is 30' long):


Top roll: $10.99
Bottom roll: 10.99
3 embellishment packs @ $3.99 each (and I probably used about 60-75% of the embellishments only)

That's less than $26 + a couple rolls of tape! AWESOME value for such a big impact on a room.

Wednesday, November 17, 2010

Romp in the Swamp Louisiana Halloween Party - Talbot Topping

True Blood was one of my main reasons for choosing the Louisiana theme, though in the end I didn't end up doing a ton of TB specific projects. I did transform the basement into Eric's vampire bar, Fangtasia, but that's still to come. Today I just wanted to post a quick little True Blood touch from my dessert table - here's Talbot:


Look familiar? How about if I show you this:


For those of you who do not follow the show, the glass jar above contains the remains of a staked vampire. The vampire's name was Talbot, and he was the lover of the very evil little vampire dude holding the jar, Russell. Russell couldn't bear that Talbot was gone, so he hauled that glass urn all over creation with him, talking to it and being generally creepy, till Sookie Stackhouse dumped it down the garbage disposal laughing maniacally. I really wanted to do that after the party, but I don't have a garbage disposal. And I wanted to save the rest of the strawberry compote anyways :)

The glass apothecary jar was from Homegoods - my only caution is to get one wide enough to allow a ladle down in, mine was just barely big enough for a small scoop, and they're not very long generally. It's filled with strawberry compote - just the frozen "sliced strawberries in sugar" you get in the grocery store, and we served it with mini cheesecakes, pound cake, and vanilla ice cream. I had 3 servings of Talbot that night :)

The nametag was a very quick project - I found the "Hello, My Name Is" tag in a google image search (this might not be the exact one, but you get the idea), slapped it into Powerpoint, and used the "Chiller" font to put in the name. I printed it on tagboard and cut it out, attached it to the lid with a small curl of tape and it was done.

This was easy and really fun - I'd definitely recommend it for True Blood parties. You could also use chunky red salsa and eat "Talbot" with chips!

Tuesday, November 16, 2010

Romp in the Swamp Louisiana Halloween Party - Recipes!

I'm falling behind. I just finally sucked up all the feathers and pulled the last of the 3M strips off the living room ceiling yesterday. But I promised recipes and rundowns of all the Halloween 2010 highlights, and I intend to deliver, so today here are the recipes I tried out for NOLA themed food. Keep in mind, I'm the pickiest eater on the face of the planet, and add pregnancy on top of that. I don't eat anything spicy, seafood, white sauces, vegetables, sour cream, or a million other things that most people do. So...I didn't actually try most of these. Yeah, that's right. I have no idea how they taste other than the reviews my guests gave and how much was left over at the end. But I can comment on the process of making them, from the eyes of someone with zero experience.

First Up, Confetti Rice:


I knew I needed some vegetarian dishes to balance out the meaty main courses I was bringing in, and I wanted something that still had relevance to the theme. I started googling "Cajun recipes" and wandered onto Zatarain's site, where I found "confetti rice." I decided to try it because it fit the theme & was vegetarian friendly, and also since it was served cold I could make it ahead and didn't have to find another chafing dish or crock pot to keep it hot.

Confession: I have never cooked rice. Seriously. I'm scared of it. I assumed it was hard. On Hell's Kitchen, people always get yelled at for bad rice. But guess what? I followed the directions on the box, and it worked just fine. I couldn't find Zatarain's Long Grain & Wild Rice in the 3-4 stores I looked in, so I ended up grabbing another brand (Rice a Roni maybe? It was right next to the Zatarains stuff). The boxes were remarkably similar, so I convinced myself it would be fine. I quibble a little with the "preparation time" being listed as 5 minutes...maybe if you are used to chopping onions and peppers, but I surely am not. I'm also terrible at estimating how many peppers and onions I needed to get a cup or half cup (this was a recurring theme in everything I cooked). I made a double batch of this recipe, and I used less than one onion, and less than two really small peppers (I got a 4-pack of small but pretty colored sweet peppers. I figured something called "confetti" needed a few more pops of color). It did look pretty, and at least one person told me they liked it, so I consider it a success. There was a lot left over, but in general I make too much food, so it's hard to say if that meant anything.


Next Up - something I did actually try, and it was WAY BETTER than I had thought! SWAMP JUICE punch:


We asked guests to bring a bottle for the bar (for the first time ever, usually we've provided everything) but with myself + a bunch of other pregnant ladies in attendance, I knew I wanted a few NA beverage options too. In addition to all the mixers, a punch seemed like a good idea. I went with this "Green Punch Recipe" from allrecipes.com. I think I may have added too much ginger ale, and my husband added way too much ice...but I'm glad he did. I had planned to float chunks of rainbow sherbet on top, but I didn't...which was also good. This is actually a REALLY sweet punch, and cutting it just a bit with more ice and not adding more sweet sherbet wasn't a bad decision. You might even consider leaving out some of the sugar or adding more water to taste. The color is a very vivid green (perfect for the name "SWAMP JUICE"), and the taste was more citrus than limey, which I prefer. It was quick - I dissolved the jello early in the day, let it cool, and then mixed in everything else except the ginger ale and refrigerated it till party time. I'd definitely make this again, would be perfect for St. Patty's day.

Another themed attempt - also from the Zatarains site, I made "Creole Mustard Dip" for veggies. Since I don't eat either veggies or dip, I have no idea how this tasted. I do know I made WAY too much (a double batch), even the "normal" batch seems big for veggie dip.


This was really easy to make as well, my only difficulties were finding the creole mustard (finally tracked it down at Byerly's) and again, estimating how much of an ingredient I really needed. I failed on the latter situation at EVERY possible turn -I bought 3 of the tiny jars of mustard, and used 1. And again, that was for a double batch. I bought at least double the sour cream I used. Oops. I clearly need to learn my conversions before shopping for ingredients :) I also saved time by pairing this with a store-bought veggie tray from Target - I'm not fast at washing & chopping fruits & veggies, and it's not stuff that can be done very far in advance, so it was worth it to me to pay a little more and save the time for more pressing needs.

A final recipe I used, that I don't have a photo to share of, was a Bananas Foster recipe cooked in a crock pot. This got rave reviews! I used AllRecipes.com again, and on their site you can scale recipes to the number of servings you want - I used 10. I wouldn't go much more than this in a standard size crock pot, but 10 servings fit okay. I also used a crock pot liner, since I knew I was going to end up with sticky caramelized sugar and I did NOT want to scrape that all off! For rum I used Malibu, because we had it on hand, and because there was coconut being added anyways I figured the flavors would mesh just fine. We offered pound cake and vanilla ice cream to serve it over, and it was nearly gone by the end of the night. I meant to try this, and somehow was too busy till it was about wiped out. Heard great things though, and I'll probably try it again on a smaller scale.

None of these were showstoppers on the scale of last year's "Peppered Pigs in a Blanket," but they were all easy enough to make and fit the theme, so I'd recommend them for a Mardi Gras/New Orleans themed event.

Thursday, November 04, 2010

Romp in the Swamp Louisiana Halloween Party - Invitations


It may be costly, and it may not be "green," but I still cling to invitations as an integral part of most parties. The invite is the first hint of the masterpiece to come, sets the tone for your event, and plants an image in your guests' minds that may convince them whether or not to make room on their busy social agendas for your party. With all of the other "competing" Halloween events out there, I want to capture my guests' imaginations early, inspiring them to create elaborate costumes and exciting them about the event.

But I also have to live within the confines of my budget & schedule...

So with those goals in mind, here are the invitations I created for our 2010 "Romp in the Swamp" Louisiana-themed Halloween Extravaganza:

For the party details, I used credits I already had to create a deck of cards through Heritage Makers (normally around $19.99, cheaper if you catch them on sale or host a workshop.) Just because they're called playing cards does NOT mean you have to put hearts and spades on them, like all of Heritage Makers' products they are fully customizable. I plucked an image of a spooky swamp off of Google images (I believe it's from one of the Pirates of the Caribbean movies?), centered it in an antiqued looking frame because it wasn't quite hi-resolution enough to resize it over the whole card, and added the party title as a caption. This image was the "back" of the playing card, so it was printed on the entire deck.


For the other side, which would normally have each separate number & suit (2 of hearts, 3 of clubs) I typed out the important factors my guests needed to know - theme, date, costumes REQUIRED, RSVP email, BYOB request, and NO KIDS decree (unless you could keep them in your womb all night). I worded everything slightly more creatively (in my humble opinion), but you get the idea. I split the deck into 2 halves, and spread the info over 2 "pages" to be readable.


When the cards arrived, I used clear tape to seal each of the pages together like a little book - the swamp scene on the outside, party details inside. Because I already had the credits to make the cards & the tape, this part cost me: $0.

And for the "big wow" factor I knew I wanted to play up on the voodoo aspect with some mini voodoo dolls. I looked around briefly at purchasing (too expensive), and though I found some tutorials for string or stick versions, in my head a voodoo doll was plushier, so you could stick pins in strategic places. So I set about creating them myself.

I used a gingerbread cookie cutter as my pattern (Wilton, I believe, from my stash of them) and cut them from 2 layers of black felt ($2 after my 40% off coupon at Michael's, it was enough to cut at least 35 sets).


For the hair and hearts I got some smaller sheets of colored felt ($0.29 each - I used most of one white sheet, and barely made a dent in the red, blue, green, purple, and pink ones - less than $2 for all). The "faces" were made by tracing around a shot glass, the eyes are tiny buttons from the quilting section of Michael's (about $4 for 2 packages). I secured all of the embellishments with fabric glue to save time - it was way easier to use, but made it almost impossible to sew through, so keep that in mind when you are applying and keep it away from the seams. The fabric glue was about $7 with a 40% off coupon at Joanns, and I still have most of it left.


I had a bunch of tiny spools of colored thread from an old sewing kit (no idea where that came from) so I used that to messily whip stitch around the edges of each doll, and stuffed them with fiberfill from an old pillow that had torn, but I kept around for just such an occasion.

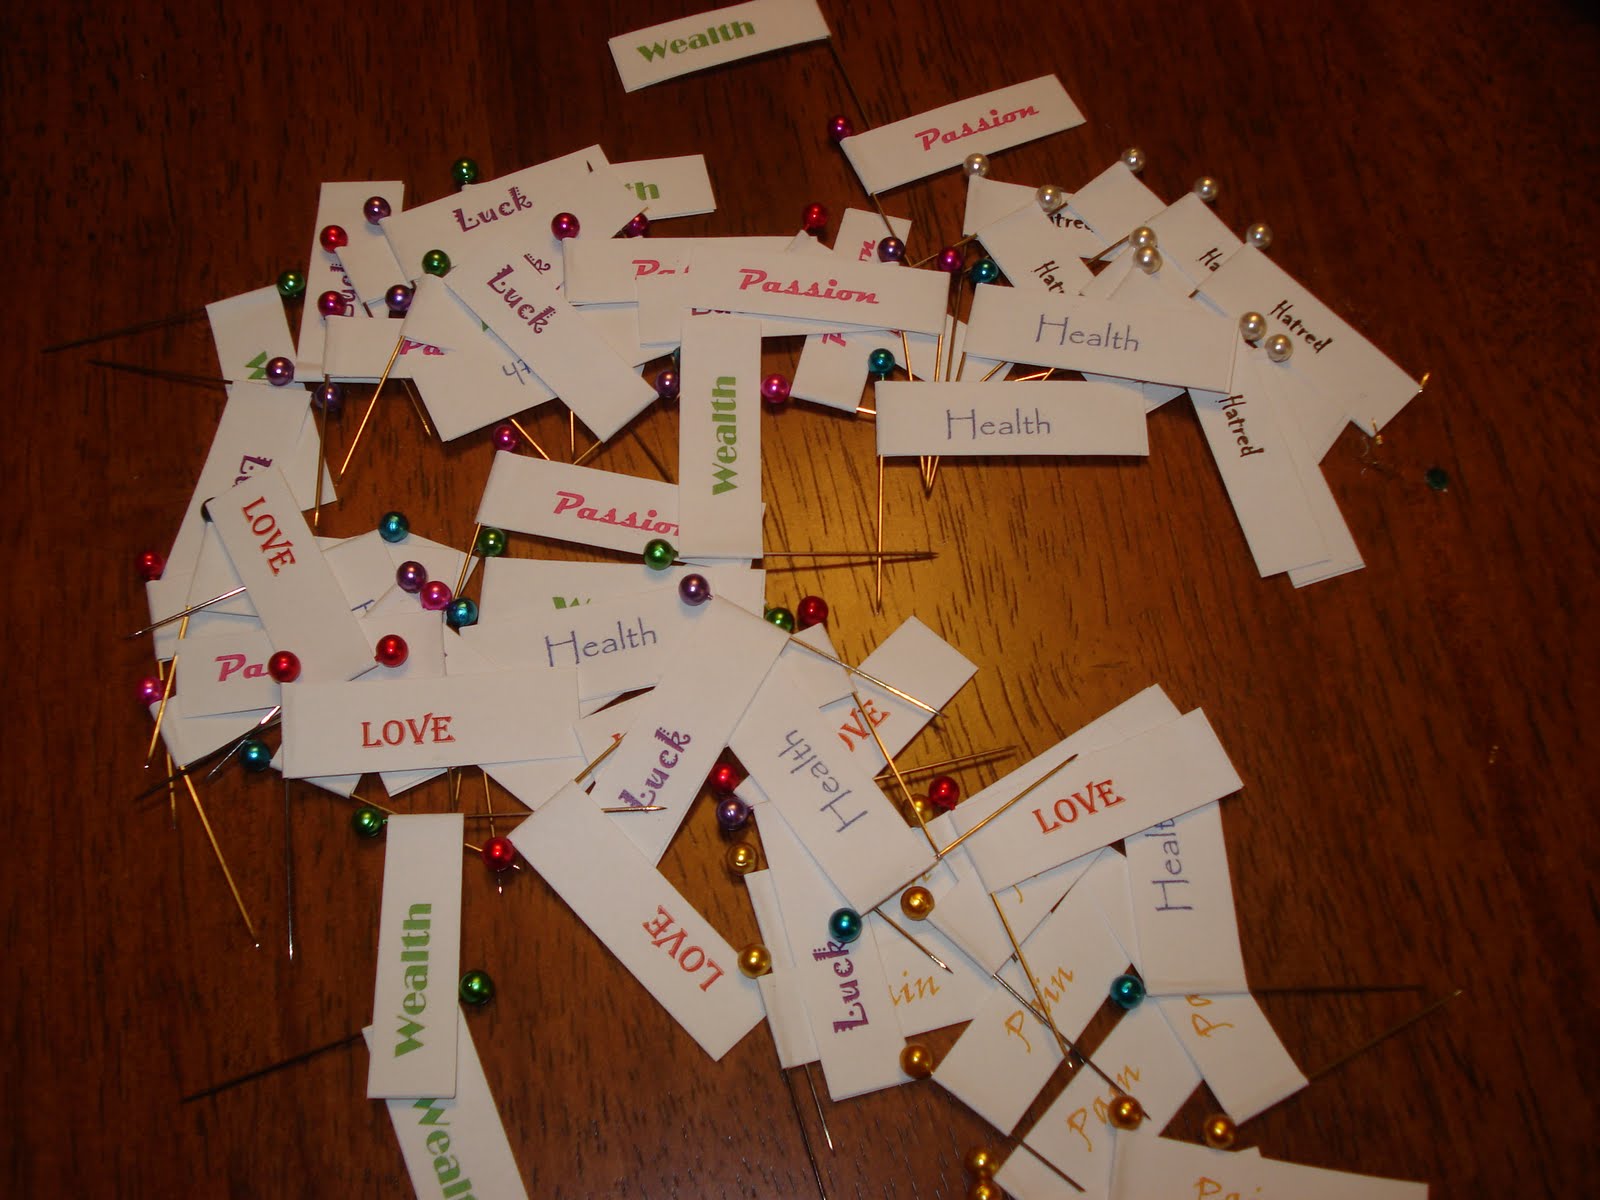
To underscore that these were VOODOO dolls (in case people just thought they were strange gingerbread men or something) I knew I wanted to include some pins. I printed off lists of words one might cast spells around - wealth, love, passion, luck, pain, health, hatred - each in a different font, and in a different color. I cut them into strips so that the word was on each side of a tiny flag, and secured them to pins with double stick tape.


I had already printed the words when I went looking for the pins, but I found these awesome "wheels" of colorful bead-topped pins that matched PERFECTLY! I bought them during "coupon commotion" week, so I was able to use 40% off coupons on all 3 wheels, for a total of just $14 for all of the pins.


I punched the cards with a tiny hole punch, strung through some gold ribbon I had lying around, and looped it around each doll. Then I stabbed 3 pins in each, positioning them carefully as not to let them come through the envelope and stab anyone, wrapped them in 1/4 sheet strip of tissue paper, and stuffed them in envelopes.

I had a box of 1/2 sheet envelopes lying around from a previous project, so again, that didn't cost me anything, and I used printable labels for addressing. I downloaded a creepy typewriter font from 1001 free fonts (google it - excellent, free, and fun, except there is no "1" character, so you have to use a lower case "l" and really watch what you are doing, or you'll have "0" where you typed a "1"). I paired it with a clip art voodoo doll from google images, and voila!


To save money, I did hand deliver about half of the invitations to people I was seeing for various things the week I sent them out, and the rest got mailed at a cost of $1.22 each.


Total cost for invites was about $55 for 30 invites.

Friday, November 06, 2009

Tips & Tricks: Wicked Wonderland Talking Flowers Scene

I have to admit, one part of the Disney film I really enjoy is Alice's journey through the giant flower garden. The flowers are so snarky and superior, I just have to laugh, and I think their faces are really clever. Remember my post here with the great "school marm" iris?

I chose two walls essentially to be my garden area, in what is really the dining room but essentially a continuation of the living room :) I used the wall that is straight ahead as you enter the house, between the dining area & kitchen - where I had a table with all the sweets, and the wall between the dining area & hallway to the bathroom, where my china cabinet is.

I had a major photo fail regarding the china cabinet - I never got a picture of it all decked out, and took down all the decor before I realized it! Boo! Here's a photo from early on in the decorating, so you can see the giant gerbera daisies with their google eyes, and my Alice tea set & hand painted platter that are displayed there year round:


To that I added my standard fall decor of two lighted pumpkins I got for a steal at Patina's after Halloween sale in 2005, and four sections of glitter fall leaf garland I picked up at JoAnn's last year and wrapped with orange lights. You can see the lighted pumpkins in the same place last year with the Hollywood theme -


I have these all hooked to an outlet behind the cabinet, so I use a remote kit to turn them off and on (as opposed to pulling it out or climbing up every time). I got my kits at Costco, and can't seem to find the same ones online, but they are similar to these on Amazon - you plug their plug into the outlet, and your decor into their plug, and then a battery operated remote turns them off and on with ease. I use these for my upstairs window lights and outdoor stuff as well, and at Christmas I do the trees on them - so much easier than crawling around!

Another tip is that I use 3M cord clips to keep a set of extension cords accessible at all times in this area - I always seem to have something lit on top of the china cabinet, and it's a huge pain to move, so I leave them plugged in (I know, not the greenest option, but I'm okay with it) and have a cord clip holding the power end to the back top lip of the china cabinet. They're command strips, so they'll come off clean if I want them too, but in the mean time they're super handy:


On the other wall I used a sheet of green "net lights" from Menard's (meant to cover bushes or railings) to add the feel of vines & foliage. I hung them with the tiniest 3M clips, specifically meant to hold holiday lights. I can attribute a large portion of my budget each year to 3M strips, but it's totally worth it - they hold everything I need to hang on walls or ceiling, and come off totally clean, which is what I need.


Tucked into the web and hanging from slightly larger 3M hooks are more giant flowers - evil daffodils! I mentioned I had scooped these up for a steal at a clearance center, knowing they were too good to pass up. It took me 3 or more years to actually use them, but they really make the scene! I debated using a less 'permanent' method of securing them open, but in the end I just hot glued the honeycomb portion - they didn't stay open with just the clips, and I was hot gluing the eyes on anyways. So they're not really salvageable since they won't fold down now, but that's fine, I think the whole bunch cost me less than $10.


The red eyeballs were 4/$0.99 at Michael's in the Halloween section, I think they're foam. The little divot in the center just screamed out for a single cyclops eye, so most of them have that and I love it. A few got two, a few got leftover google eyes - I mixed it up with what I had lying around :)


For finishing touches I tucked in my collection of Dept. 56 spiders - made from bells! I scooped up a whole ton of these guys at Home Goods a few years back, $7.99 for 6 and they're just my style. I hung them from more tiny 3M strips, and just sort of intermingled them in the garden - it's infested!


To add interest I printed off some of my favorite snarky quotes from the Disney version of the garden scene - simple green ink on white card stock, using the Beyond Wonderland font. You can google "wonderland quotes" or go to the IMDB sites of movies to find lists - like this one regarding the Disney film.


In the center of the room, between the food & flowers, I hung foil swirls from the ceiling (3m strips again) around the light. I just wanted to add some color and shine, I thought these evoked the feeling of walking into a tall garden. They didn't cost me anything, as they were reclaimed from a 60th anniversary party!

This was also the area that the food was displayed in, so I have to show some pictures of that!


I used more of the Queen of Hearts card suit themed decor to form a canopy over the buffet area, and created the "EAT ME" sign in PowerPoint. I printed it on 11"x17" paper then taped it to some tagboard for strength and hung it via the plastic tabs and 3M strips I used for everything else. Same with the canopy - it's one of the "Casino Ceiling Decor" banners, a few self stick tabs in strategic places, hung with 3M strips on the ceiling. I loved it!


To the left of the table I tucked in a "looking glass" I had snagged at the goodwill for $9 and spray painted silver. It was actually really helpful for catching all the red lipstick I was getting on my teeth, and after the party it's a great addition to my craft room where I sew and make costumes.


I actually had a really hard time fitting all of my food on to the tables, that should have clued me in that I made too much :) The first table was the "real food" - two chafing dishes borrowed from mom with the hot appetizers, and a crock pot of BBQ weenies, 3 plates of sandwiches, a fruit platter, and the munchies - popcorn, chex mix, goldfish. That bled into a 2nd smaller table:


With more "real food" - my puking pumpkin platter, meat & cheese platter, crackers, and mini bread bowls with spinach dip.


I either already have or will be soon posting tutorials and reviews on how to make all of my Wonderland menu items.

The third table, watched over by the giant flowers was ALL sweets!


The Queen's Stolen Tarts, Peanut Butter Balls, Cream Puffs, Brownies, Cupcakes, Oreos, and a gorgeous layer cake my neighbor made with a mocha frosting I'm in love with. Yum!

Other than the food, I hardly purchased anything to fill this space - I re-purposed items I already had, so that really helped keep my budget in check. I did get two new microfiber tablecloths in a dark red, but I was due for them anyways and can use them for all sorts of other holidays and events. For tables I used our 4' kitchen table as the dessert buffet, a 6' folding table for the main food (from Target - I have 3 of these and LOVE them, they fold in half so I can carry them around myself, get them up and down the stairs, and they fit in my car - SO versatile. I use them in my craft room as well. Today they're listed at over $100, but I got mine for under $50, they usually go on sale before Thanksgiving), then a narrower 4' folding table like this one that I actually got at Goodwill hardly used. This is a really great size because it's narrow so you can put it in a smaller space.

We're almost done with re-caps, stay tuned for the Mad Tea Party, Kitchen, and bathrooms, along with a few more recipes and reviews.

Thursday, November 05, 2009

Tips & Tricks: Queen of Hearts Scene

The "WONDERLAND" marquee was the first set of paper letters I painted, and I really like the feel. I got the letters on sale at JoAnn's, and used regular craft paint to give them an antiqued, aged, red & black finish. They're hung with plastic tags and more 3M hooks, and they're the first thing you see as you walk into the house, they are straight ahead and hanging down off the ledge between the living and dining areas.


Casino party decor really made my living room come alive as the Queen of Heart's court, and set the festive tone right off the bat. Most of it I ordered from Anderson's giant party store, they seemed to have the best prices, but many party stores seem to carry the same line. Anderson's site is organized a little strangely, but I've linked directly to all the items I used:

3 X "casino ceiling decor"
5 X "card suit stringers"
4 X "casino cascades"

My favorite are the ceiling decorations, they really fill up the space, the foil is shiny in the light, and it just feels "FUN" to me.


I hung three of them in the living room, starting at a common point in the center of one wall (over the DDR) and branching out at angles across the whole rest of the living room ceiling.


The green shred with the card suit border hanging around the top of the walls is actually table skirting I scooped up on clearance at Party America, so I can't find them on their website, but I think I got 3 of them for $4.99 each. I had some trouble hanging them at times, but with a little persistence I got it all up there using 3M poster strips and blue painter's tape. I trimmed around the doors and windows for our own ease - again, this means it's harder to re-use, but less likely to get pulled down or annoy us during the MONTH we had it up :) so I went with it.


The green evoked the croquet story for me, so I hung plastic flamingos along it as well. These were from Litin Party Papers and originally I wanted to make them into 3D flamingo croquet mallets (I did one with hot glue since they were mirror images they fit together great, but were wimpy and would have cracked without some stuffing or reinforcement), but honestly I just didn't have the room to play and my dog would definitely have eaten any sort of hedgehog croquet balls, so on the wall they went.


Scattered throughout are quotes from the queen, printed in white on red background (I just used PowerPoint) with the Beyond Wonderland font. These are done on card stock and hung via painter's tape or 3M strips.


The fireplace is always a focal point, so I dressed it up in black & red. I put an old brownie pan filled with candles inside, and it glows like a fire without the smoke, mess, and heat of a real one. The garland I made myself - black roses from Michael's splattered with red paint, red jelly heart lights leftover from Valentine's Day forever ago, "Chop Shop" garland of bloody knives found at Big Lots, and re-purposed gold skeletons from last year's Hollywood garlands. I talked about some of it here, it's all just tied together with short pieces of black curling ribbon (blends right in) and hung with more 3M strips.


Another set of the red heart lights is wrapped around a black boa I had lying around and draped over the large picture frame - both strips of lights are plugged into a push button adaptor which sits on the mantle, the actual outlet is behind the photo frame and hard to access, but this way I just push the button to turn it all on.


For the photo frame I just switched out our family photos for some heart-themed jpegs I found on google image search - read about it here. I'm really proud of this idea actually, I think it was subtle but really effective - some people just assumed it was our normal art, but some people looking closer saw all the hearts, or the quote, or remembered it was usually family photos and thought it was pretty cool. It cost me next to nothing and took only a few moments to put together.


The rest of the mantle has a garland of playing cards, glass chess pieces from the goodwill (check which day games are 50% off, I think this set cost me $1), misc. black, red & silver skulls, candle holders, and other stuff from my collection.


The checkerboard wall is done with a roll of plastic tablecovering & painter's tape. The checkered pattern can be hard to find, I was annoyed none of the party stores carried it and had to resort to ebay. Still a big impact for a reasonable price - with shipping it was around $30 a roll.


The big entertainment I kept secret until party time - last year it was a shot luge, this year I rented the arcade version of "Dance Dance Revolution" from a local party rental shop. I knew watching would be as fun as playing, so I set it up as the "main attraction" in the center of the checkered wall. I already had a big area rug there to protect my wood floors, and made sure the dance pads sat on that (they're big, metal wrapped, and heavy). It was a little hard to navigate around when people were coming in at the beginning, but not awful - I'm still learning about the traffic patterns in our new house. The monitor was supposed to come on a stand, but when it didn't we improvised with a sturdy coffee table (some people did really start the house shaking with their wild "dance" moves, so I'm glad we didn't use anything less stable!).


To the right of that I threw up a little table with the costume awards & prizes, mostly so I didn't forget to hand them out, as well as a shelf with all of the goodie boxes.

Overall, this room was exactly what I wanted - a big old "impression" right off the bat. I think it captured everyone's attention right away and definitely portrayed the "Wonderland" theme. Now that I've taken it all down, my house feels very empty!