

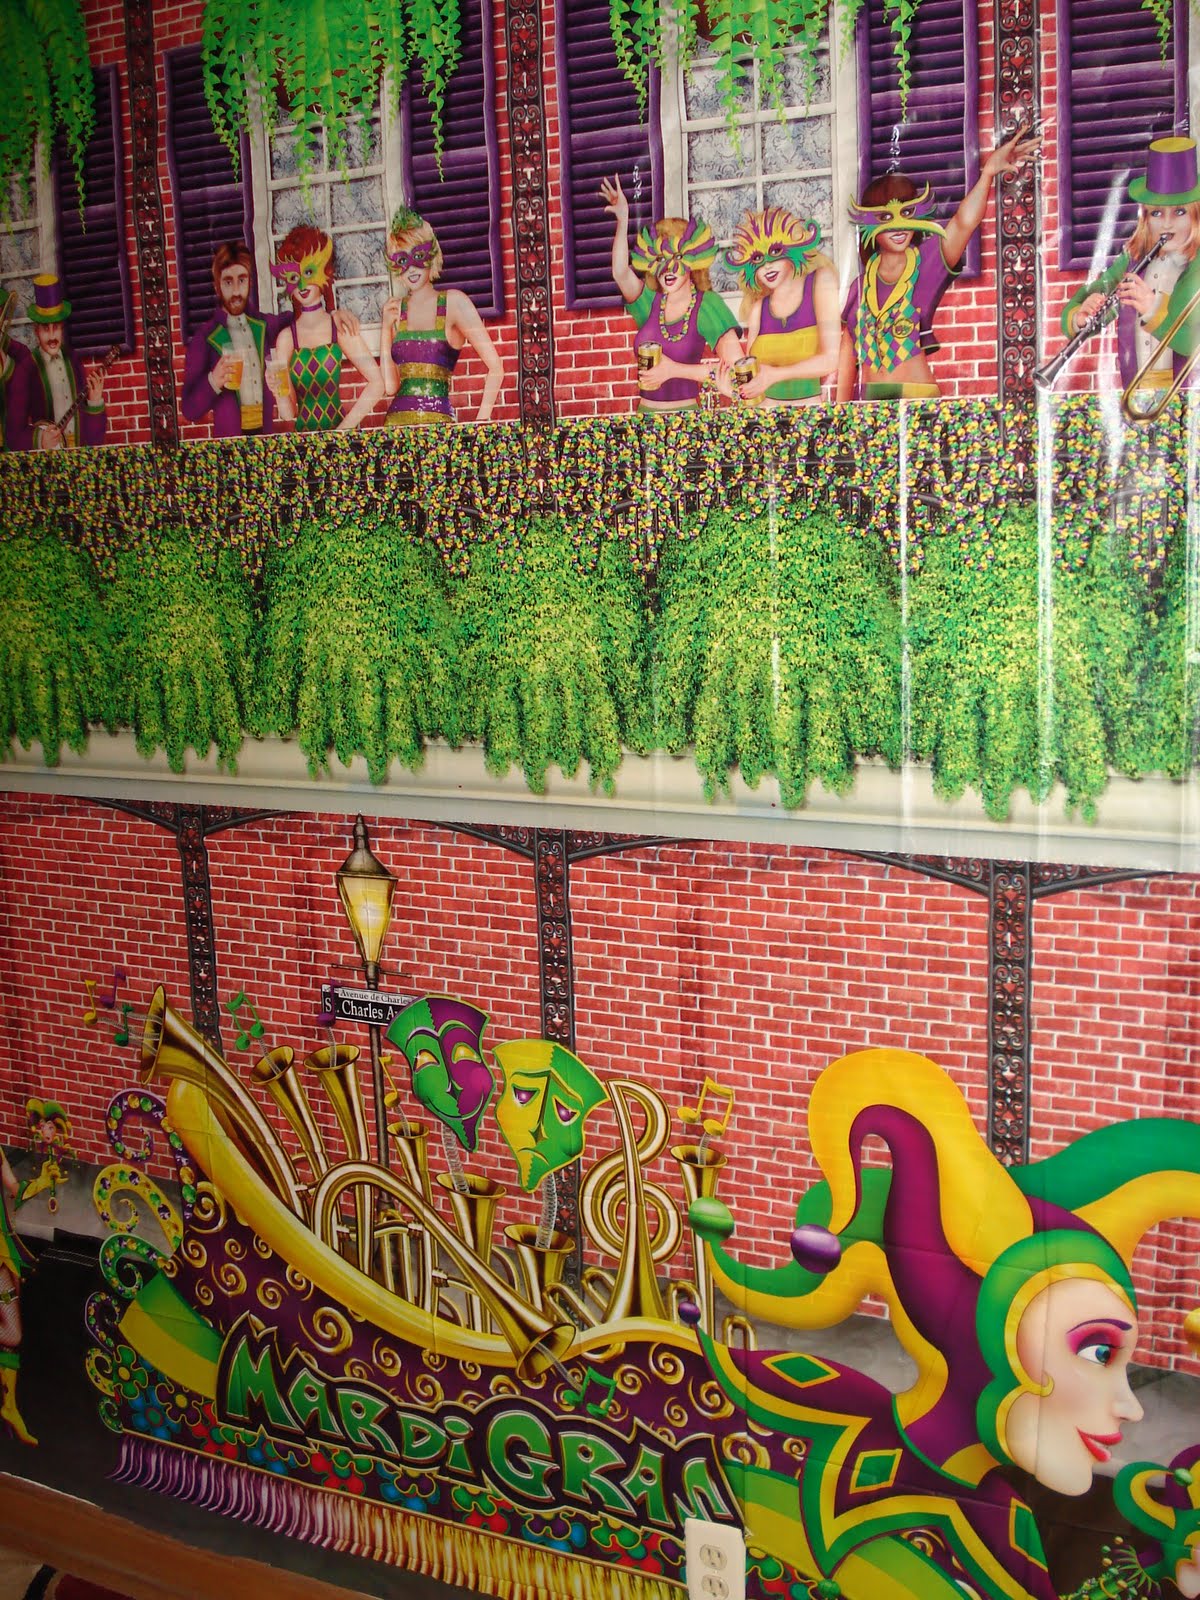
The scene setter comes in 2 main rolls, each 4' high. The top roll is here, the bottom roll is here. When I say "rolls", I'm being a little generous - it would be better if they were actually on rolls like the gossamer, but they're really sort of folded. This means they have some creases, which is annoying, but for the price, it's still a great deal.
For ease of keeping things straight, I decided to line the top up with the coved ridge of our wall/ceiling, so I knew I wouldn't use the full 8' height, but that was fine. I used blue painters' tape to form a line of tape curls all across the top of the room .

I tried to alternate directions with the tape, though I have no scientific reason for this, I just feel like it holds better.

Then I carefully hung the top section of the print across the whole length of the room, smoothing it along the tape curls so it didn't pucker or pull. It's helpful to have 2 people do do this, but I did it solo & 7 months pregnant, so it's not a huge deal since everything is light and I wasn't up that high.

Next it was time to add the 2nd roll. The bottom panel has the archways on it, so you don't want to let the top hang over too far and cover all that up or it will look awkward. To get the right vertical alignment, I temporarily folded the top panel upwards and secured it to itself with a little painters' tape so it didn't get in the way. I ran another row of tape curls in a straight line about 1-2" above where the top panel would end, and then hung the bottom panel, careful to line up the arches/posts horizontally as well.

I let down the top panel to hang over the bottom slightly, and used double-stick tape to secure the bottom edge of the top panel to the top of the bottom panel where they overlapped. I had a little excess length at the bottom of the lower panel that I just cut off, and ran more blue tape curls along the bottom edge of the wall to secure it fully. I cut around our vents and electrical outlets too.

I even turned a little bit of the corner with the scene setters, and then cut around the archway as needed.

Once the main pieces were up, it was time to embellish! I bought a the add on sets of revelers, lamp posts & decor, and parade floats. I didn't realize it when I ordered, but these are also on big sheets of vinyl:

So it does take a fair amount of time to cut them all out. You don't have to be exact, because the background is clear, but you want to remove most of the extra weight. I used clear double sided tape to adhere the embellishments to the backdrops:

They were SO CUTE! You really get a lot for $3.99, I had enough for every veranda on the long wall to have some revelers, and a few more over the fireplace. There were several designs that were alternated. I love these frat boys:

I repeated the same process with the lamp posts, Mardi Gras floats, and stilt walkers, being conscious of layering & perspective when necessary (i.e., should the floats be going in front of or behind the lamp posts?). The clear double sided tape was perfect because it didn't really show, and it held tight. I didn't use all the embellishments - other than the lampposts, I didn't use anything in that set, but it was still worth it for the lamps. I used some of the stilt walkers and clowns on the walls elsewhere in the house too. The final effect:

Voila! Let the wild rumpus begin!
It took me a LONG time to put this up, I pretty much spent 9 solid hours between this and all of the hanging decor in the living room, but it was totally worth it. Everything came down really easily too - the vinyl peeled right off of the painters' tape and I was able to roll everything up to use again if I want. I would definitely recommend these scene setters, and will probably keep using them in the future when they fit my themes. The total cost for decorating this whole wall + the additional patch over the fire place (and some more left over - each scene setter is 30' long):

Top roll: $10.99
Bottom roll: 10.99
3 embellishment packs @ $3.99 each (and I probably used about 60-75% of the embellishments only)
That's less than $26 + a couple rolls of tape! AWESOME value for such a big impact on a room.
1 comment:
Great job on the Mardi Gras decorating. Just a quick correction, those are actually Insta-Theme backdrops, and props, not Scene Setters. Just so others will know what to look for at their party store or online. ; )
Post a Comment